


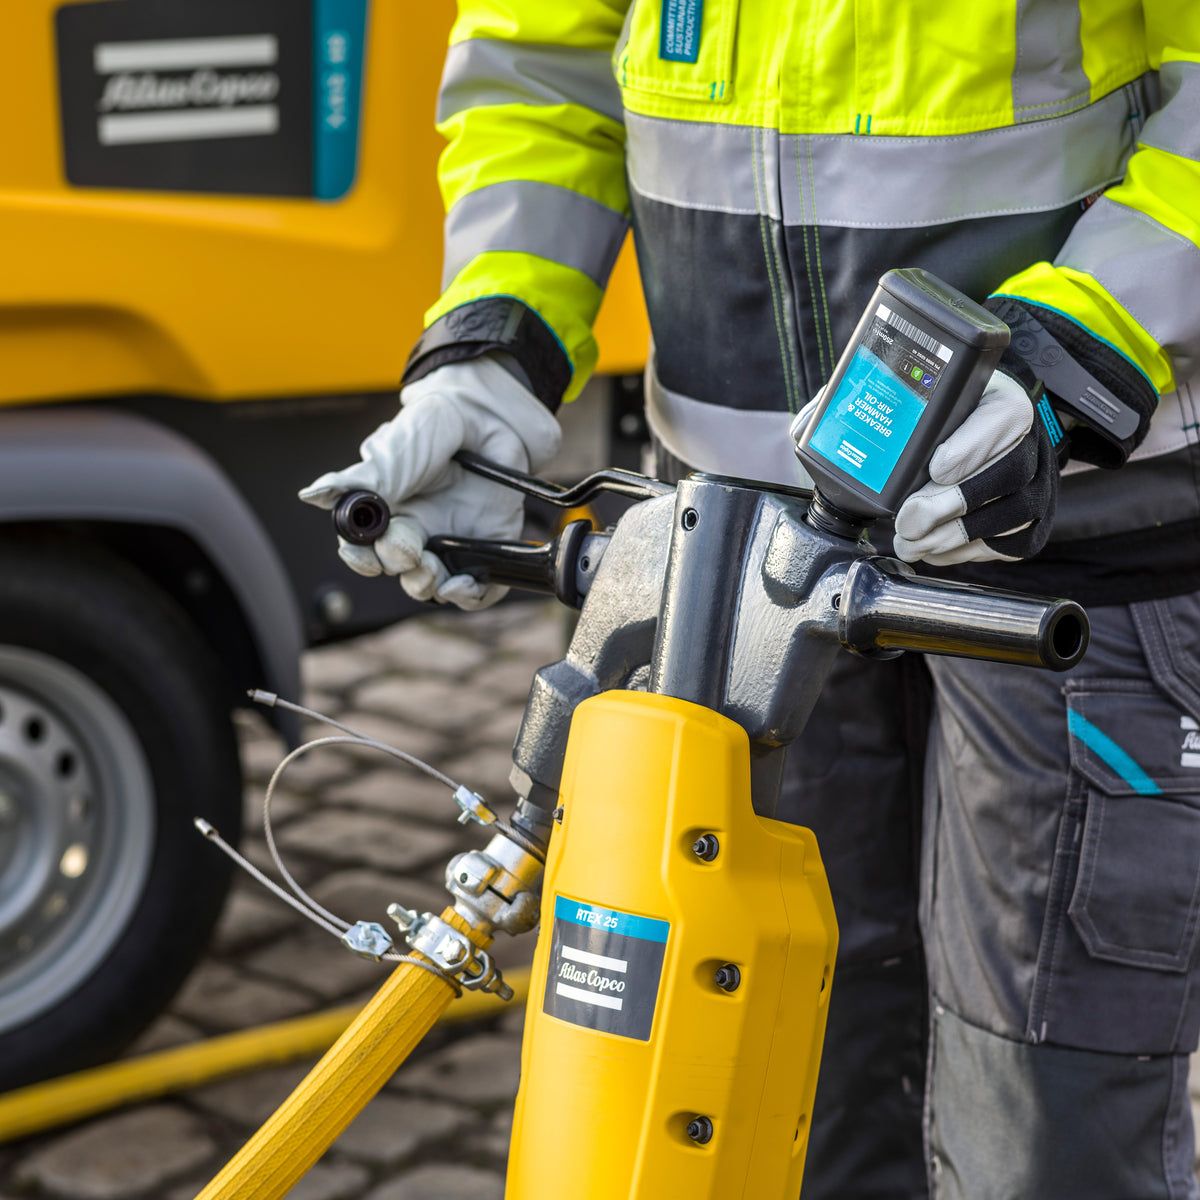
A 90 pound breaker costs more than most of the hand tools on your truck combined, and the fastest way to turn one into scrap is to run it dry for a week. We get this call a lot. The tool starts hitting soft, the operator leans on it harder, and by the time it comes back to the shop the piston and cylinder are galled and the rebuild quote is half the price of a new one.
Almost always, the fix was a sixty dollar part nobody installed. An air line lubricator sitting between the compressor and the hose is the cheapest insurance in pneumatic demolition, and it is the piece of the air train that crews skip most often.
This is a companion to our broader guide on compressed air for construction contractors. That one covers sizing the compressor and the whole jobsite system. This one is about the oil.
Why demolition tools need oil in the air at all
A paving breaker, a backfill tamper, a chipping hammer, a rivet buster: all of them are a piston slamming back and forth inside a steel cylinder, thousands of times a minute, with a valve chest shuttling air to each end. There is no oil sump and no grease fitting on the working parts. The only lubrication those surfaces ever see is what arrives suspended in the air stream.
Take that oil away and three things happen in order. The valve starts sticking, so the tool loses blows per minute and feels weak. Then the piston and cylinder start scuffing, which shows up as metal in the exhaust. Then it seizes. On a 90 pound class breaker running around 1,250 blows per minute, that whole sequence can play out in a few days of hard use.
The other job the oil does is displace water. Jobsite air is wet, especially out of a towable compressor on a humid day, and demolition tools run cold enough at the exhaust to condense it. Oil in the line coats the internals and gives the water somewhere to go besides bare steel.
First, check whether your tool already has an oiler built in
Before you buy anything, look at the tool. Plenty of paving breakers, backfill tampers, and rammers come with an integral oiler: a small reservoir cast into the backhead or the handle, with a fill plug on top. Air on its way to the valve chest picks up oil from that reservoir, so the tool lubricates itself for as long as somebody keeps it full.
Filling one takes about thirty seconds. Stop the tool, bleed the air, wipe the area around the plug so grit does not fall in, back the plug out, top the reservoir off with rock drill oil, and snug it back down. That is the whole procedure, and it is the single most skipped item in pneumatic demolition.
The catch is capacity. These reservoirs hold a few ounces at most. On a breaker running hard that is a fill at the start of the shift and usually another one after lunch, and the tool gives you no warning when it runs out. Crews that rely on a built-in oiler and check it once a week are effectively running dry most of the week.
So a built-in oiler is not automatically a reason to skip a line lubricator:
- One tool, short hose, one operator who actually fills it: the built-in oiler is enough.
- Two or more tools off a header, long hose runs, rental tools, or a crew where nobody owns the fill: put a lubricator on the branch and let it meter continuously. The built-in reservoir becomes the backup instead of the only defense.
- Running both is fine. Set the line lubricator on the lean side using the cardboard test below so you are not double-dosing and fouling the muffler.
What you should not do is assume the tool has one. Most chipping hammers, rivet busters, scalers, and a fair number of imported breakers have no reservoir at all, just an air inlet. If you cannot find a fill plug and the manual does not mention one, treat the tool as having none and oil it from the line.
Sizing: flow first, bowl second
The mistake we see most is a shop-size lubricator bolted onto a line feeding a 90 CFM breaker. A quarter inch FRL-style unit will choke that tool, and the operator will blame the compressor.
Work from the actual tool draw:
| Tool | Typical air demand at 90 psi | Minimum lubricator port |
|---|---|---|
| Chipping hammer, light scaler | 10 to 25 CFM | 1/2 inch |
| Backfill tamper or rammer | 25 to 45 CFM | 1/2 to 3/4 inch |
| 30 to 40 lb breaker | 33 to 64 CFM | 3/4 inch |
| 60 lb breaker | 46 to 76 CFM | 3/4 inch |
| 90 lb paving breaker | 77 to 92 CFM | 3/4 to 1 inch |
| Rivet buster | 35 to 60 CFM | 3/4 inch |
Those breaker numbers come from published manufacturer data. A Tamco TPB-90 is rated at 77 CFM, a Chicago Pneumatic 90 pound class unit runs around 81 CFM, and most of the class lands between 77 and 92. The old rule that a breaker eats roughly its weight in CFM is close enough for a first pass.
Pick a lubricator whose rated flow is comfortably above the tool, not equal to it. A unit rated 175 SCFM feeding an 85 CFM breaker will barely register a pressure drop. A unit rated near 100 SCFM on the same tool is working at the edge of its curve and you will feel it. Our air line lubricators run from quarter inch mini units up to two inch bodies rated near 1,200 SCFM, so match the port size to the header, not to the hose end.
Bowl capacity is the second decision, and it is purely about how often somebody has to refill it. A 5 ounce poly bowl is fine on a bench. On a two tool crew running all day, a 29 or 60 ounce metal bowl means you fill it at the start of the shift and forget it. Metal bowls are also the right call outdoors, because poly bowls can be attacked by solvents and they do not love UV.
How many drops per minute?
Here is where people guess. The honest answer is that the setting depends on flow. Published guidance lands around one to ten drops per 20 SCFM, with roughly three drops per minute being a common starting point on a moderate line.
Practical method that works on a jobsite:
- Run the tool at normal duty with the sight dome visible.
- Start at about one drop every 10 to 15 seconds and let it run five minutes.
- Hold a clean piece of cardboard about a foot off the tool exhaust for ten seconds.
- You want a light, even film. Dry cardboard means turn it up. Visible running oil or spatter means turn it down.
Over-oiling is not harmless. It fouls the muffler, it blows oil mist into the breathing zone of whoever is standing there, and on a demo job it means oil on whatever you are tearing out. Under-oiling kills the tool. The cardboard test splits the difference in about two minutes and costs nothing.
Use the right oil, and it is not compressor oil
This one costs people real money. Rotary screw coolant and reciprocating compressor oil are not air tool oils. They are formulated to stay in a sump, resist oxidation at high temperature, and separate cleanly from air. Air tool oil is formulated to atomize, carry, cling to a reciprocating surface, and tolerate water.
For demolition tools specifically, reach for a rock drill oil rather than a general air tool oil. Rock drill oils are tackified so they stay on the piston under impact instead of being blown straight out the exhaust. They come in a range of ISO viscosity grades, commonly 46, 100, 150, and 220. Rough selection:
- ISO 46 to 68 for cold weather, light chipping hammers, and anything where you need the oil to still flow below freezing
- ISO 100 to 150 for general breaker and tamper work in moderate temperatures, which is where most crews live
- ISO 220 for heavy breakers in hot weather or high-impact work where the lighter grades fling off
The same oil goes in a built-in reservoir and in a line lubricator bowl, so there is no reason to stock two products. If you are working in real cold, use the lighter grade. A heavy oil that gums the valve chest at 10 degrees F will cost you more downtime than the wear you were trying to prevent. We covered the broader question in our air tool oil guide.
Where to put it
Mount the lubricator downstream of the filter and regulator, and as close to the tool as practical. Oil will not reliably travel long horizontal runs or climb vertical rises, so a lubricator at the compressor feeding 200 feet of hose is mostly decorating the compressor.
Order for a jobsite setup:
- Compressor discharge
- Water separator or filter, because you do not want slugs of water hitting the lubricator bowl
- Regulator if you are running below full line pressure
- Lubricator
- Short whip hose to the tool, 25 to 50 feet ideally
Mount it vertical and upright. A lubricator on its side will not meter correctly, and the sight dome becomes useless. If a tool has to live at the end of a long hose, put an inline oiler at the tool end rather than trusting the one at the compressor.
One thing to watch: whipchecks and safety cables still apply at every connection you add, and a lubricator adds two joints to the line. Our quick couplers and hose hardware are sized for this service, but the safety cable is not optional on a 90 CFM line.
When you should not use one
Be honest about the exceptions. Some tools are specified lube-free, and adding oil will damage the seals or void the warranty. Many modern pneumatic nailers are in this group, and so are lube-free air motors. Check the tool manual before you plumb an oiler in front of it.
Also, do not put a lubricator on a shared header that feeds blow guns, a paint operation, or anything where oil in the air is a problem. Put the lubricator on the tool branch only. If you run both demolition tools and finishing work off the same compressor, split the header and treat each branch for what it does.
Maintenance, which is about ten minutes a month
Check the bowl at the start of every shift the tools run, and check the tool's own reservoir at the same time if it has one. Wipe the sight dome so somebody can actually see the drip. Drain the upstream filter, because water that gets past it will emulsify in the bowl and the oil will stop metering. Once a quarter, pull the bowl, wash it with soapy water rather than solvent if it is poly, and check the O-ring.
If the drip rate wanders on its own, the usual causes are a partly plugged adjustment needle, water in the oil, or a bowl filled with the wrong viscosity for the weather. All three are ten minute fixes.
Frequently Asked Questions
My breaker has a built-in oiler. Do I still need an air line lubricator?
Not always. A single tool on a short hose with an operator who tops the reservoir off every few hours is adequately protected. The reservoir only holds a few ounces, though, and the tool gives no warning when it empties, so on multi-tool crews, long hose runs, or rental fleets a line lubricator is worth it. Running both is fine as long as you set the line unit lean.
How often do I fill the oiler on the tool itself?
Start of every shift, and again partway through on a tool that runs continuously. Bleed the air first, wipe around the plug so grit does not drop into the reservoir, fill with rock drill oil, and retighten.
Can I just squirt oil in the air inlet before I start the tool?
You can, and crews have done it for a hundred years, but it only lubricates the first few minutes of run time. On a tool that runs all day it is not enough, and it is impossible to meter consistently. A line lubricator does the same job continuously and does not depend on anyone remembering.
What size air line lubricator do I need for a 90 pound breaker?
Match the port to the line. A 90 pound breaker draws 77 to 92 CFM, which means 3/4 inch minimum and 1 inch if the run is long. Pick a unit rated well above the tool's CFM so the lubricator is not the restriction. A 175 SCFM high-flow unit is a comfortable match.
Will a lubricator cause a noticeable pressure drop?
A correctly sized one, no. Expect roughly 1 to 3 psi at rated flow. An undersized one can easily cost you 10 psi or more, which on a breaker shows up as fewer blows per minute and an operator complaining the compressor is weak.
Can I use motor oil or compressor oil in it?
No. Motor oil contains detergents and additives that attack tool seals, and compressor oil is designed not to atomize. Use an air tool oil, or a rock drill oil for breakers and tampers, in an ISO grade matched to your working temperature.
Do I still need a filter if I have a lubricator?
Yes, and it goes first. The filter catches water and scale from the compressor and the hose. Without it, water reaches the lubricator bowl, emulsifies with the oil, and the unit stops delivering a clean drip.
A properly sized air line lubricator, the right grade of oil, and a two minute cardboard check are the difference between rebuilding breakers every season and running them for years. It is the cheapest line item in the whole air train, and it is the one that decides how long the expensive parts last.


